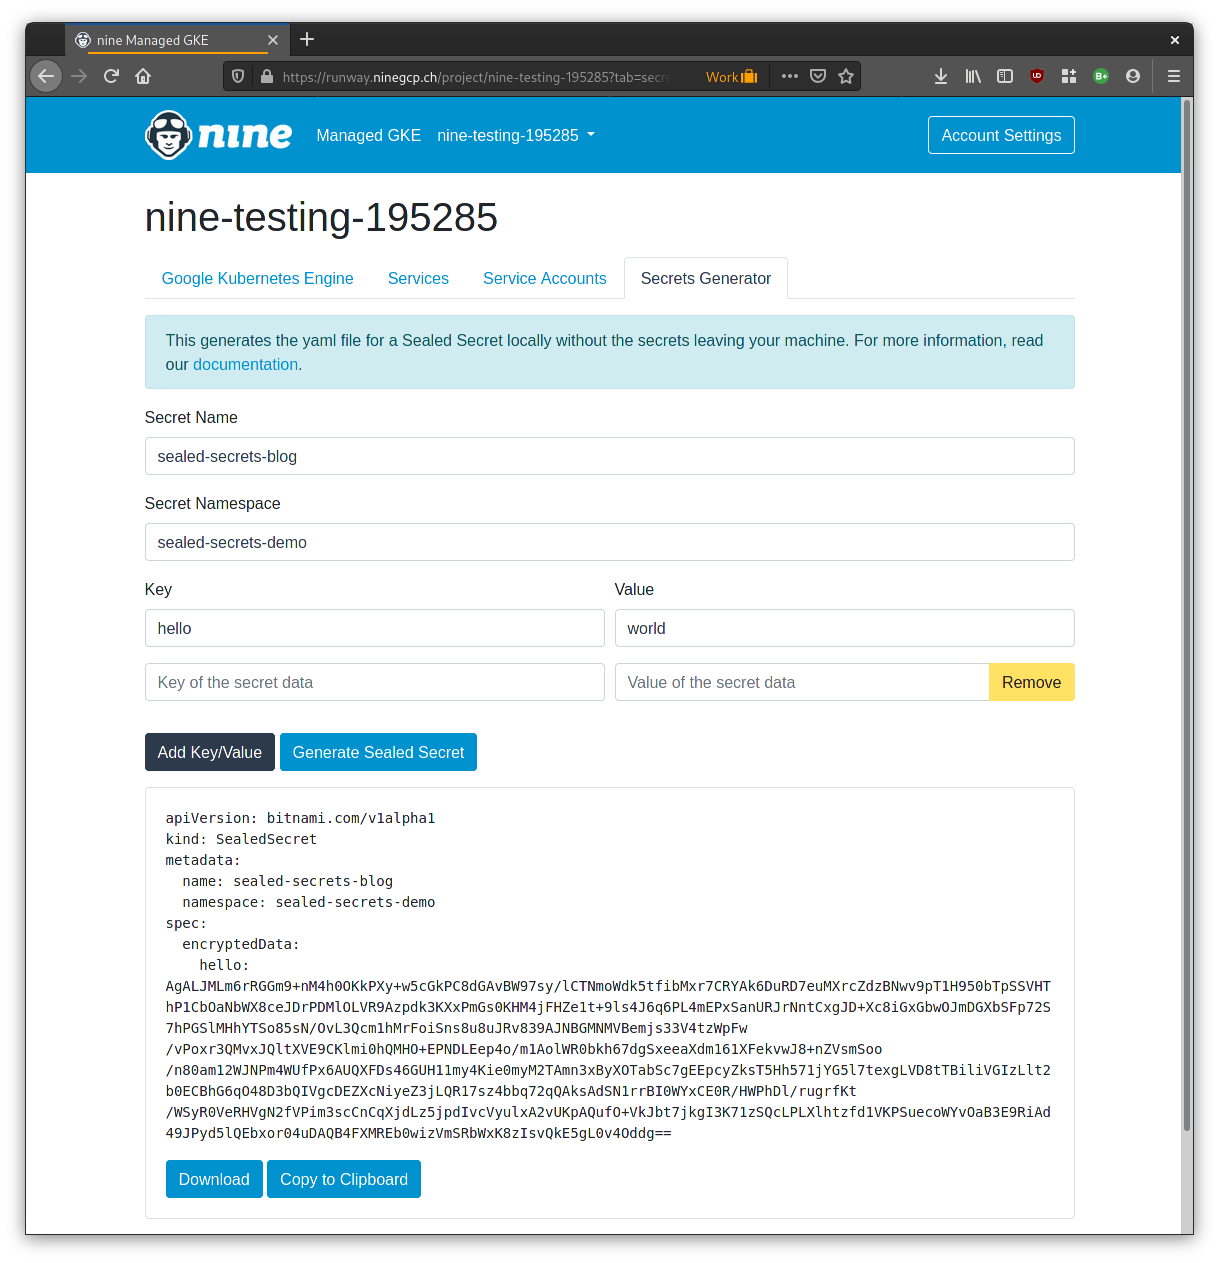
In the last GKE news we announced the release of a new feature Sealed Secrets, in this blog post we will go a bit deeper to explain how we got here and how it works behind the scenes.
The Problem
As Kubernetes Secrets contain sensitive information and are not encrypted by default (only base64 encoded), you should not store them with your other Kubernetes configuration in a version control system.
So the problem we wanted to solve is pretty straight forward: > How can I manage my Secrets like all other Kubernetes configuration?
After evaluating a number of different solutions, we liked the Bitnami Sealed Secrets the best.
- The concept is simple
- You just apply an encrypted version of a Secret called Sealed Secret and the controller creates the unencrypted secret only on the cluster
- It seems easy to maintain
- Just one component to deploy
We noticed just one downside and that were the client-facing tools. As a user you need to have a simple way to create a Sealed Secret. There is a command line application called kubeseal which will generate a Sealed Secret for you but that first needs access to the controller to get the public key and you already need to create a normal Secret before. So we could just tell our customers to install the kubeseal utility and document the usage but it does not really feel properly integrated in our product.
Integration
So how do we integrate it into our product? One idea that came up early is to put it into our Web UI Runway. But we initially did not like the idea because:
- Option A: We are sending the sensitive secret content to some service which will do what kubeseal does locally
- Option B: We somehow implement this locally in Javascript
Even thinking about Option A made us uncomfortable and Option B would mean we would have to re-implement all the crypto operations that kubeseal does which also sounds daunting and error-prone.
As we thought about the problem some more a third option surfaced: Webassembly
A quick introduction to Webassembly
WebAssembly (abbreviated Wasm) is a low-level, assembly-like language with a compact binary format that runs with near-native performance and provides languages such as C/C++, Rust and Go with a compilation target so that they can run on the web1. Go has had experimental support for Webassembly since 1.112 and most modern browsers have had support for it for a while now3.
To compile a Go program for WebAssembly is simple, just the GOOS and GOARCH variables need to be set accordingly:
1GOOS=js GOARCH=wasm go build -o main.wasm
After compilation, this is ready to be run in a browser. A bit of Javascript and HTML is required to load the Wasm file and execute it. For a full example, have a look at the Go wiki.
So this sounds promising, our vision is to be able to use existing Go code from kubeseal in the browser on the client side.
Implementation
Proof of Concept
At this point we have read up on Webassembly and we wanted to create a proof of concept with it before we take this any further. As we basically want to replicate what the kubeseal utility does on the command line we turned to the source code of that. When they create a new Sealed Secret the private function seal is called. This first decodes a Kubernetes Secret resource and then creates a new Sealed Secret from that. A call to ssv1alpha1.NewSealedSecret with the Kubernetes Secret returns an encrypted Sealed Secret. So that is basically what we want to do as well.
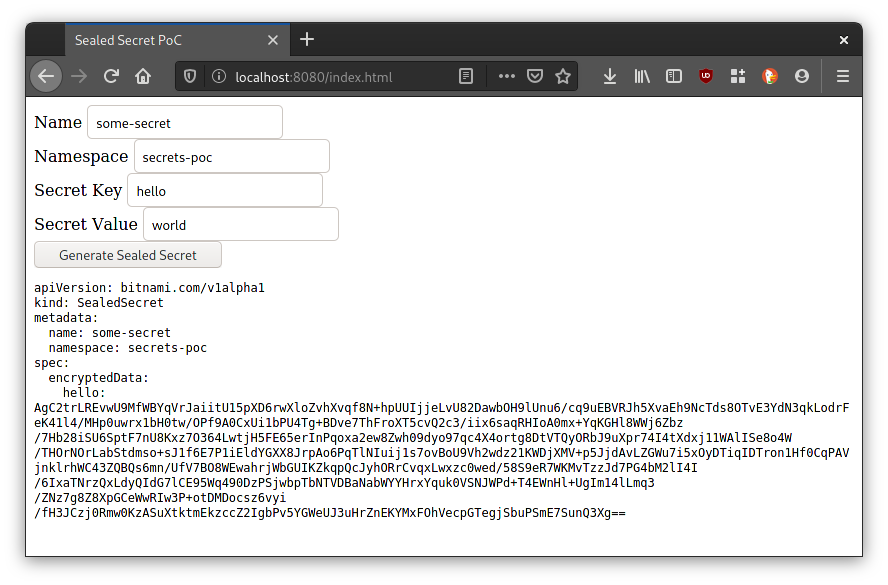
At first, a very basic HTML form was created to allow the user to specify the secret name, namespace and a key value pair for the actual secret data. Below that form a button to run the Wasm code and a placeholder for the generated output.
 1<body>
 2  <label for="name">Name</label>
 3  <input type="text" id="name"/><br>
 4  <label for="namespace">Namespace</label>
 5  <input type="text" id="namespace"/><br>
 6  <label for="secretKey">Secret Key</label>
 7  <input type="text" id="secretKey"/><br>
 8  <label for="secretValue">Secret Value</label>
 9  <input type="text" id="secretValue"/><br>
10  <button onClick="run();" id="runButton" disabled>Generate Sealed Secret</button>
11  <br>
12  <pre id="output"></pre>
13</body>
 1func main () {
 2  // get js document
 3  document := js.Global().Get("document")
 4  // get values of input fields
 5  name := document.Call("getElementById", "name").Get("value").String()
 6  namespace := document.Call("getElementById", "namespace").Get("value").String()
 7  secretKey := document.Call("getElementById", "secretKey").Get("value").String()
 8  secretValue := document.Call("getElementById", "secretValue").Get("value").String()
 9  log.Printf(
10    "name: %s, namespace: %s, key: %s, value: %s\n",
11    name, namespace, secretKey, secretValue,
12  )
13}
Running this, we were able to input some values into the form, use Go code to get the values and print them out on the browser console. Now what is left for our proof of concept is to generate the Sealed Secret and write that to the HTML DOM. Now let’s use that NewSealedSecret function:
 1func sealedSecret(name, namespace, key, value string) (*ssv1alpha1.SealedSecret, error) {
 2  // parses the public key string to a *rsa.PublicKey
 3  pubKey, err := parseKey(strings.NewReader(pubKey))
 4  if err != nil {
 5    return nil, err
 6  }
 7  // creates the sealed secret
 8  secret := &v1.Secret{
 9    ObjectMeta: metav1.ObjectMeta{
10      Name:      name,
11      Namespace: namespace,
12    },
13    StringData: map[string]string{key: value},
14  }
15  return ssv1alpha1.NewSealedSecret(scheme.Codecs, pubKey, secret)
16}
For the time being we just hardcoded a pre-generated public key pubKey as a string constant. Now back in our main function we want to use this SealedSecret object and output it to our DOM:
1ssecret, err := sealedSecret(name, namespace, secretKey, secretValue)
2if err := nil {
3  log.Fatal(err)
4}
5// get our output node and set the innerHTML to a string representation of ssecret
6document.Call("getElementById", "output").Set("innerHTML", fmt.Sprintf("%s\n", ssecret))
After compiling and giving it a try in the browser, we are able to generate a secret! Only one thing really bothers us: The Wasm binary takes up a whopping 36MB. With compression we might be able to shrink that a bit but it is still way too large for a normal page load. We already kind of feared this would happen as the Go Wasm wiki also mentions the file size.
So what caused the binary to grow so dramatically? Having worked with the Kubernetes Go APIs quite a bit, we suspected them immediately. The NewSealedSecret function wants a *v1.Secret, which already causes a whole lot of imports. So to cut down on imports we need to drop some of the convenience and use lower level APIs to get to our goal. In the end what we really care about is all the crypto related code that we want to reuse. Digging a bit more into the Sealed Secret source we find the function we are looking for, crypto.HybridEncrypt. We adjust our current code to use that:
1// by default the "label" is expected to be <namespace>/<name>
2label := []byte(fmt.Sprintf("%s/%s", namespace, name))
3ciphertext, err := crypto.HybridEncrypt(rand.Reader, pubKey, []byte(secretValue), label)
Now that we have the ciphertext, which represents the encrypted secret value, we just need to output it in a usable form. We want to present the user with the Sealed Secret YAML representation so it can be stored with the other Kubernetes configuration. To do that efficiently, we have opted to use go templates to render the final YAML. We define a Secret struct to hold our values and then use the secretTemplate to render the whole thing.
 1type SealedSecret struct {
 2  Namespace  string
 3  Name       string
 4  SecretData map[string]string
 5}
 6
 7const secretTemplate = `apiVersion: bitnami.com/v1alpha1
 8kind: SealedSecret
 9metadata:
10  name: {{ .Name }}
11  namespace: {{ .Namespace }}
12spec:
13  encryptedData:
14    {{- range $k, $v := .SecretData }}
15    {{$k}}: {{$v}}
16    {{- end }}
17`
18
19func main() {
20  // [...]
21  t := template.Must(template.New("sealedsecret").Parse(secretTemplate))
22  var b []byte
23  w := bytes.NewBuffer(b)
24  s := SealedSecret{
25    Name:       name,
26    Namespace:  namespace,
27    SecretData: map[string]string{secretKey: base64.StdEncoding.EncodeToString(ciphertext)},
28  }
29  if err := t.Execute(w, s); err != nil {
30    log.Fatal(err)
31  }
32  document.Call("getElementById", "output").Set("innerHTML", fmt.Sprintf("%s\n", w))
33}
After executing the template, we just output the result to the HTML DOM. It does not look pretty yet, but it works:

We were able to apply this in a test cluster which had the corresponding private key and it was able to decrypt the Sealed Secret just fine. And what about the Wasm binary size? We are down to 5.7MB, which is a great improvement over the 36MB we had before.
The proof of concept was shared with the team and soon it was decided that we should integrate this into our Web-UI Runway.
Testing
With every feature we develop, we want to at least cover the main functionality in our tests. The simplest way to test Wasm code at the time seemed to be the library wasmbrowsertest. This takes care of the test setup and runs the Wasm code in a real browser instance. So besides our usual Go CI/CD pipeline, we just added another step to execute GOOS=js GOARCH=wasm go test in a docker image with chromium and go_js_wasm_exec preinstalled.
Final Integration
For the proper integration, the code stayed mainly the same and was just a bit refactored to keep executing the Wasm code for as long as the page is open to be able to use Javascript event callbacks. And of course the public key which was hardcoded before needs to be fetched from the respective controller, which is done by the Runway backend. The form was tweaked to allow for more than one key value pair and some more buttons were added to allow to copy the YAML to the clipboard or write it to a file.
To further reduce the loading times and bandwith usage of our application, we use compression for the Wasm binary. The gzipped version is 1.6MB and if the browser supports it, there’s a version with brotli compression which comes down to 1.2MB.
As for the controller part, this is being deployed like other services in our product and lives in a nine-prefixed namespace. The controller watches all Sealed Secrets resources in the cluster and takes care of decrypting it to a normal Secret.


